10 Tips for Writing an Engaging Test Blog

Writing a test blog might seem straightforward, but creating one that truly engages readers takes skill and planning. Whether you are testing a new product, software, or concept, your blog should capture attention, provide clear insights, and encourage readers to interact. This post shares 10 practical tips to help you write a test blog that stands out and keeps your audience interested.
Start with a Clear Purpose
Before you write, decide what you want your readers to learn or feel after reading your test blog. Are you sharing your experience with a new tool? Explaining how a product performs? Or helping readers avoid common mistakes? A clear purpose guides your writing and keeps your content focused.
Use a Strong Opening
Grab your reader’s attention right away. Begin with a question, a surprising fact, or a brief story related to your test. For example, if you are testing a new app, start with a common problem the app solves. This approach invites readers to keep reading to find the answer.
Organize Your Content Logically
Structure your blog so readers can follow your points easily. Use headings and subheadings to break up text. For example, separate sections for setup, testing process, results, and final thoughts help readers navigate your post. Bullet points and numbered lists also make information easier to digest.
Be Honest and Specific
Readers trust blogs that provide honest feedback. Share both the strengths and weaknesses you found during your test. Use specific examples to back up your points. Instead of saying “the app is slow,” explain which features lagged and how it affected your experience.
Include Visuals to Support Your Text
Images, screenshots, or charts can make your blog more engaging and easier to understand. For instance, a screenshot showing a bug or a chart comparing performance speeds adds clarity. Make sure visuals are relevant and add value to your content.
Write in a Clear and Simple Style
Avoid jargon and complex sentences. Write as if you are explaining your test to a friend. Short sentences and everyday language help readers stay focused and understand your points quickly. This style also makes your blog accessible to a wider audience.
Use Active Voice
Active voice makes your writing more direct and lively. Instead of “The feature was tested by me,” say “I tested the feature.” This approach creates a stronger connection with readers and makes your writing easier to follow.
Engage Your Readers with Questions
Encourage readers to think and respond by asking questions throughout your blog. For example, “Have you tried this tool? What was your experience?” This invites comments and builds a sense of community around your blog.
Provide Practical Takeaways
End your blog with clear advice or next steps based on your test. Readers appreciate actionable tips they can use. For example, suggest who might benefit most from the product or how to avoid common pitfalls during testing.
Edit and Proofread Carefully
Errors can distract readers and reduce your blog’s credibility. Take time to check grammar, spelling, and clarity. Reading your blog aloud or asking someone else to review it can help catch mistakes you might miss.
Writing an engaging test blog takes effort, but following these tips will help you create content that informs and connects with your audience. Focus on clear purpose, honest feedback, and reader interaction to make your test blog a valuable resource.
1
Searing the Beef
Sear beef fillets on high heat for 2 minutes per side to form a golden crust. Let it cool before proceeding to keep the beef tender.
2
Mushroom Duxelles
Cook the mushrooms until all moisture evaporates to prevent soggy pastry. Aim for a thick, paste-like consistency.
3
Puff Pastry Handling
Keep the puff pastry cold to avoid softness. Chill if it becomes too soft, and score the top lightly without cutting through.
Notes
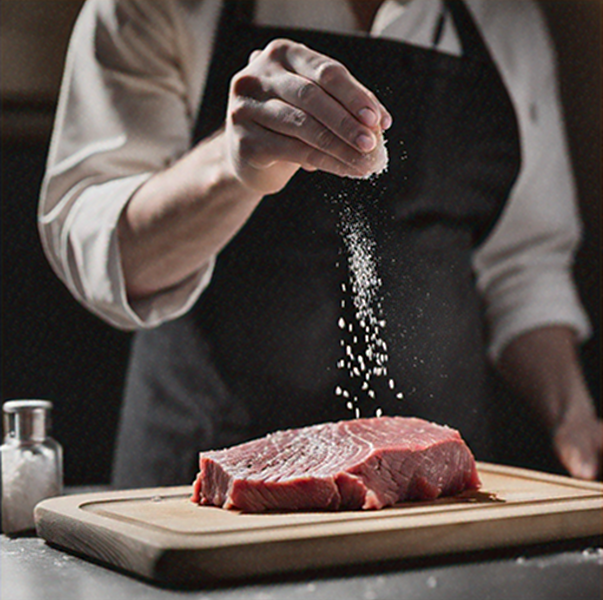


1
Season the good fresh beef fillets with salt and black pepper. Heat olive oil in a pan over high heat and sear the fillets for 2 minutes per side until it fully browned. Remove the beef from the pan and brush with a thin layer of mustard. Let it cool.



2
Chop the Chestnut Mushrooms. now u can Blend it , Heat olive oil in a pan over medium heat and add the mushrooms and thyme. Cook for 10-15 minutes until all moisture from the mushrooms has evaporated. Set aside to cool.
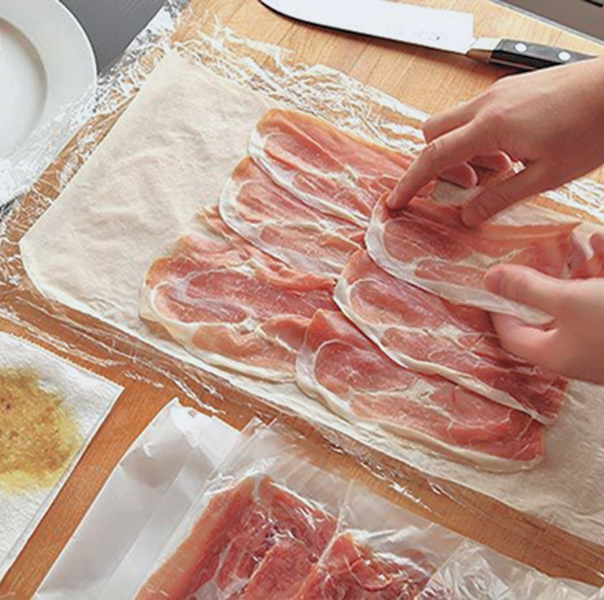


3
Lay plastic wrap on a flat surface. Arrange Parma ham slices in a slightly overlapping layer. Spread the mushroom mixture evenly over the ham. Place the cooled beef fillets on top, and roll tightly using the plastic wrap. Chill for 20-30 minutes in the fridge.


4
Roll out puff pastry on a floured surface. Unwrap the beef from the plastic wrap and place it in the center of the pastry. Wrap the pastry around the beef, sealing the edges with egg wash. Brush the entire pastry with egg wash and chill for 15-20 minutes.


5
Heat olive oil in a large saucepan and add the beef trimmings. Sauté for 5 minutes to brown. Add the shallots, peppercorns, rosemary, bay leaf, and thyme, and cook for another 5 minutes. Add the red wine vinegar and cook for 1 minute, then pour in the red wine. Simmer until the wine reduces by half. Add beef stock and bring to a boil. Simmer until reduced to a sauce-like consistency. Strain the sauce before serving.
Instructions
test ingredients
Red Wine Sauce

Recipe - 2
test
ahmed tarek

all is test
Servings :
4 Servings
Calories:
813 Calories / Serve
Prep Time
10 min
Cooking Time
45 min
Rest Time
15 min
Total Time
1 hour 30 min
Comments